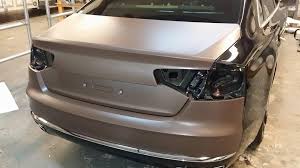
Car wraps are a fantastic way to transform the look of your vehicle without committing to a permanent paint job. Among the many color options, a sleek Brown Car Wrap can give your car an elegant, modern, and unique appearance. However, achieving a flawless finish requires careful attention to detail and proper technique. Here's a step-by-step guide to perfecting your brown car wrap application.
1. "Preparation is Key"
Before you start applying the wrap, ensure your car's surface is clean and smooth. Wash the vehicle thoroughly with soap and water, paying close attention to dirt, grease, or debris. Use a clay bar to remove any stubborn contaminants, and finish with an isopropyl alcohol wipe to eliminate any residual oils. A clean surface ensures the wrap adheres properly and reduces the risk of bubbles or peeling.
2. "Gather the Right Tools"
Having the right tools on hand will make the process smoother. Essential items include:
- A high-quality brown vinyl wrap
- A heat gun
- Squeegees with felt edges
- A sharp cutting blade
- Masking tape
- Gloves to prevent fingerprints
Investing in professional-grade tools can make a significant difference in the final result.
3. "Plan Your Application"
Before diving in, plan the layout of the vinyl wrap. Start with flat surfaces such as the hood or doors before tackling more complex areas like mirrors or bumpers. Cut the vinyl into manageable sections, leaving extra material around the edges for adjustments.
4. "Apply with Care"
Peel back the vinyl backing and position the wrap carefully on the surface. Use a squeegee to smooth out air bubbles and wrinkles as you go. Work slowly and methodically, applying even pressure to avoid creases. For curved sections, use a heat gun to make the vinyl more pliable, allowing it to conform seamlessly to the shape of your car.
5. "Trim and Tuck"
Once the vinyl is securely in place, use a sharp blade to trim excess material along the edges. Be precise to avoid cutting too much or damaging your car's paint. Tuck the edges neatly into seams or around corners for a clean, professional finish.
6. "Inspect and Finalize"
After applying the wrap, inspect your work for any imperfections. Use the heat gun to fix minor wrinkles or bubbles, and press down on any loose edges. Allow the wrap to settle for 24-48 hours before washing or exposing it to extreme conditions.(3M Vehicle Wraps)
Tips for Success
- Work in a dust-free environment with moderate temperatures for optimal results.
- Practice on smaller sections before attempting larger areas.
- Take your time—patience is crucial for achieving a flawless finish.
With proper preparation and attention to detail, you can master the art of applying a brown car wrap to give your vehicle a stunning new look. Whether you're going for a matte, glossy, or metallic finish, this guide will help ensure your project is a success!